Using the Plugin
To begin, if you haven’t already, create a ScreenGui instance under StarterGui. Open the Roblox plugin and select it.
In Figma, your imported UI must be in a parent frame. For example, if you’re exporting a settings window, place that settings window in a 1920x1080 frame to simulate a 16:9 viewport. If your parent frame is already 1920x1080, then don’t worry about changing any values! It is defaulted to this for ScreenGui.
Your imports will break if they are not in a parent frame. Please use 1920x1080 parent frames for the easiest workflow!
Figma Properties
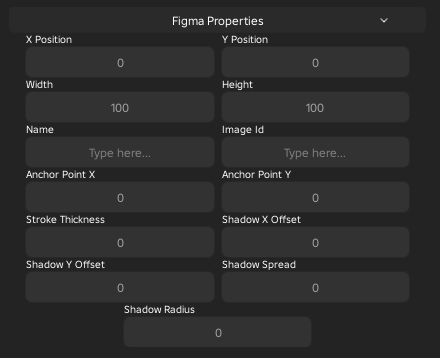
These are Figma-like properties you can set for UI elements. With an element selected, you can change the following like it's in Figma:
- X Position
- Y Position
- Width
- Height
- Stroke Thickness
- Shadow X Offset
- Shadow Y Offset
- Shadow Spread
- Shadow Radius
There are also additional fields for Roblox-related properties, such as:
- Image Id
- Anchor Point X
- Anchor Point Y
- Name
To apply these, click Apply at the bottom of the plugin.
Settings

You have two settings that you can change per-instance:
- Aspect Ratio Constraint: When enabled, the instance will maintain a correct aspect ratio based on Figma size properties
- Clip Descendants: When enabled, the instance will clip descendants
To apply these, select an instance, select your settings, and click Apply at the bottom of the plugin.
Instance Building

These are easy-to-access buttons to quickly build instances. By clicking the buttons, you can create gui objects instantly.
Convert Selected

These are quick conversion tools to convert the selected instance into another of a said type. For example, to convert an ImageLabel into an ImageButton, select the label and click To ImageButton.
Image Mapping

This is a tool that allows you to bulk-apply images to your imported UI. Read the Image Mapping page for more information on this.
Auto Import
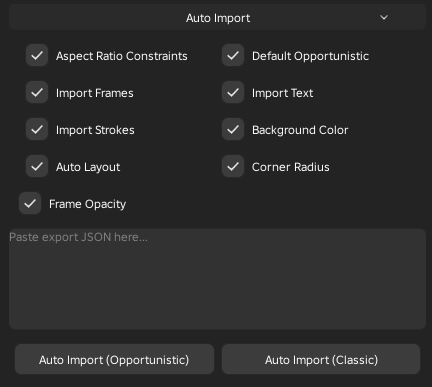
This is a tool that allows you to automatically import UI from Figma. Read the Auto Importing page for more information on this.